


Welcome to Hank’s June 2024 Astrophotography Blog! The weather has been a mixed bag as is usual for this time of year, but the big news for me has been the help I have been getting from Black Hills Astronomical Society (BHAS) Chris, in getting set up for long exposure Astrophotography. Muddling my way through these past six months has resulted in photographs that show promise, but what I’ve needed is someone to basically spend the time with me, and help put the pieces together. We have been meeting over the internet, where we can share my screen, and walk through the set-up of the software, discuss the sequence and fine tuning of capturing these faint fuzzy specks in the sky, and talk through my questions. My big take away from this month is that without that kind of support, it would never come together for me. If you are interest in doing astrophotography, my suggestion is to find someone who can guide you through it!
So here’s what I’ve settled on:
My telescope. My Celestron 8” SCT Evolution has a focal length of about 2000 mm. What that means is that the field of view is almost the width of the Moon, or about a half of a degree of sky. The other accessory I have is a HyperStar lens, that turns the telescope into about 400 mm of focal length, and about 3.5 degrees of sky. What I’ve realized is that at least for now, I’d like something between those two, so I have invested in a .63 focal reducer, which will give me a focal length of (2000 x .63) about 1260 mm. As with most things in astrophotography, you just don’t buy something and expect it to fit. So I’ve been buying adapters and spacers and all sorts of doodads to make it work. It should all be put together and working in July (my fingers are crossed).
Capture software. I’ve used the MallincamSky, SharpCap, and NINA and not one of them has met my needs. I won’t bore you with the details. After expressing my frustrations, Chris suggested I try the software he uses: CCD Ciel. It has all the features that I need, it has a pretty straight forward interface, I haven’t gotten too lost with it, and it’s FREE. It also comes with planetarium software so I can see what I’m looking at in the sky. It works well with my iOptron Mount software, it plate solves (makes sure the target is centered), focuses, works with my OAG guider to keep the image centered, makes taking calibration frames easy (or more precisely…easier). It was developed in Europe I think, and I’m told the developer responds to questions and implements suggestions. It also follows written sequences so that hopefully this winter season I’ll be able to capture hours of data on a target, move to different targets, automatically refocus and save what it does, all while I sleep! That’s the hope, anyway.
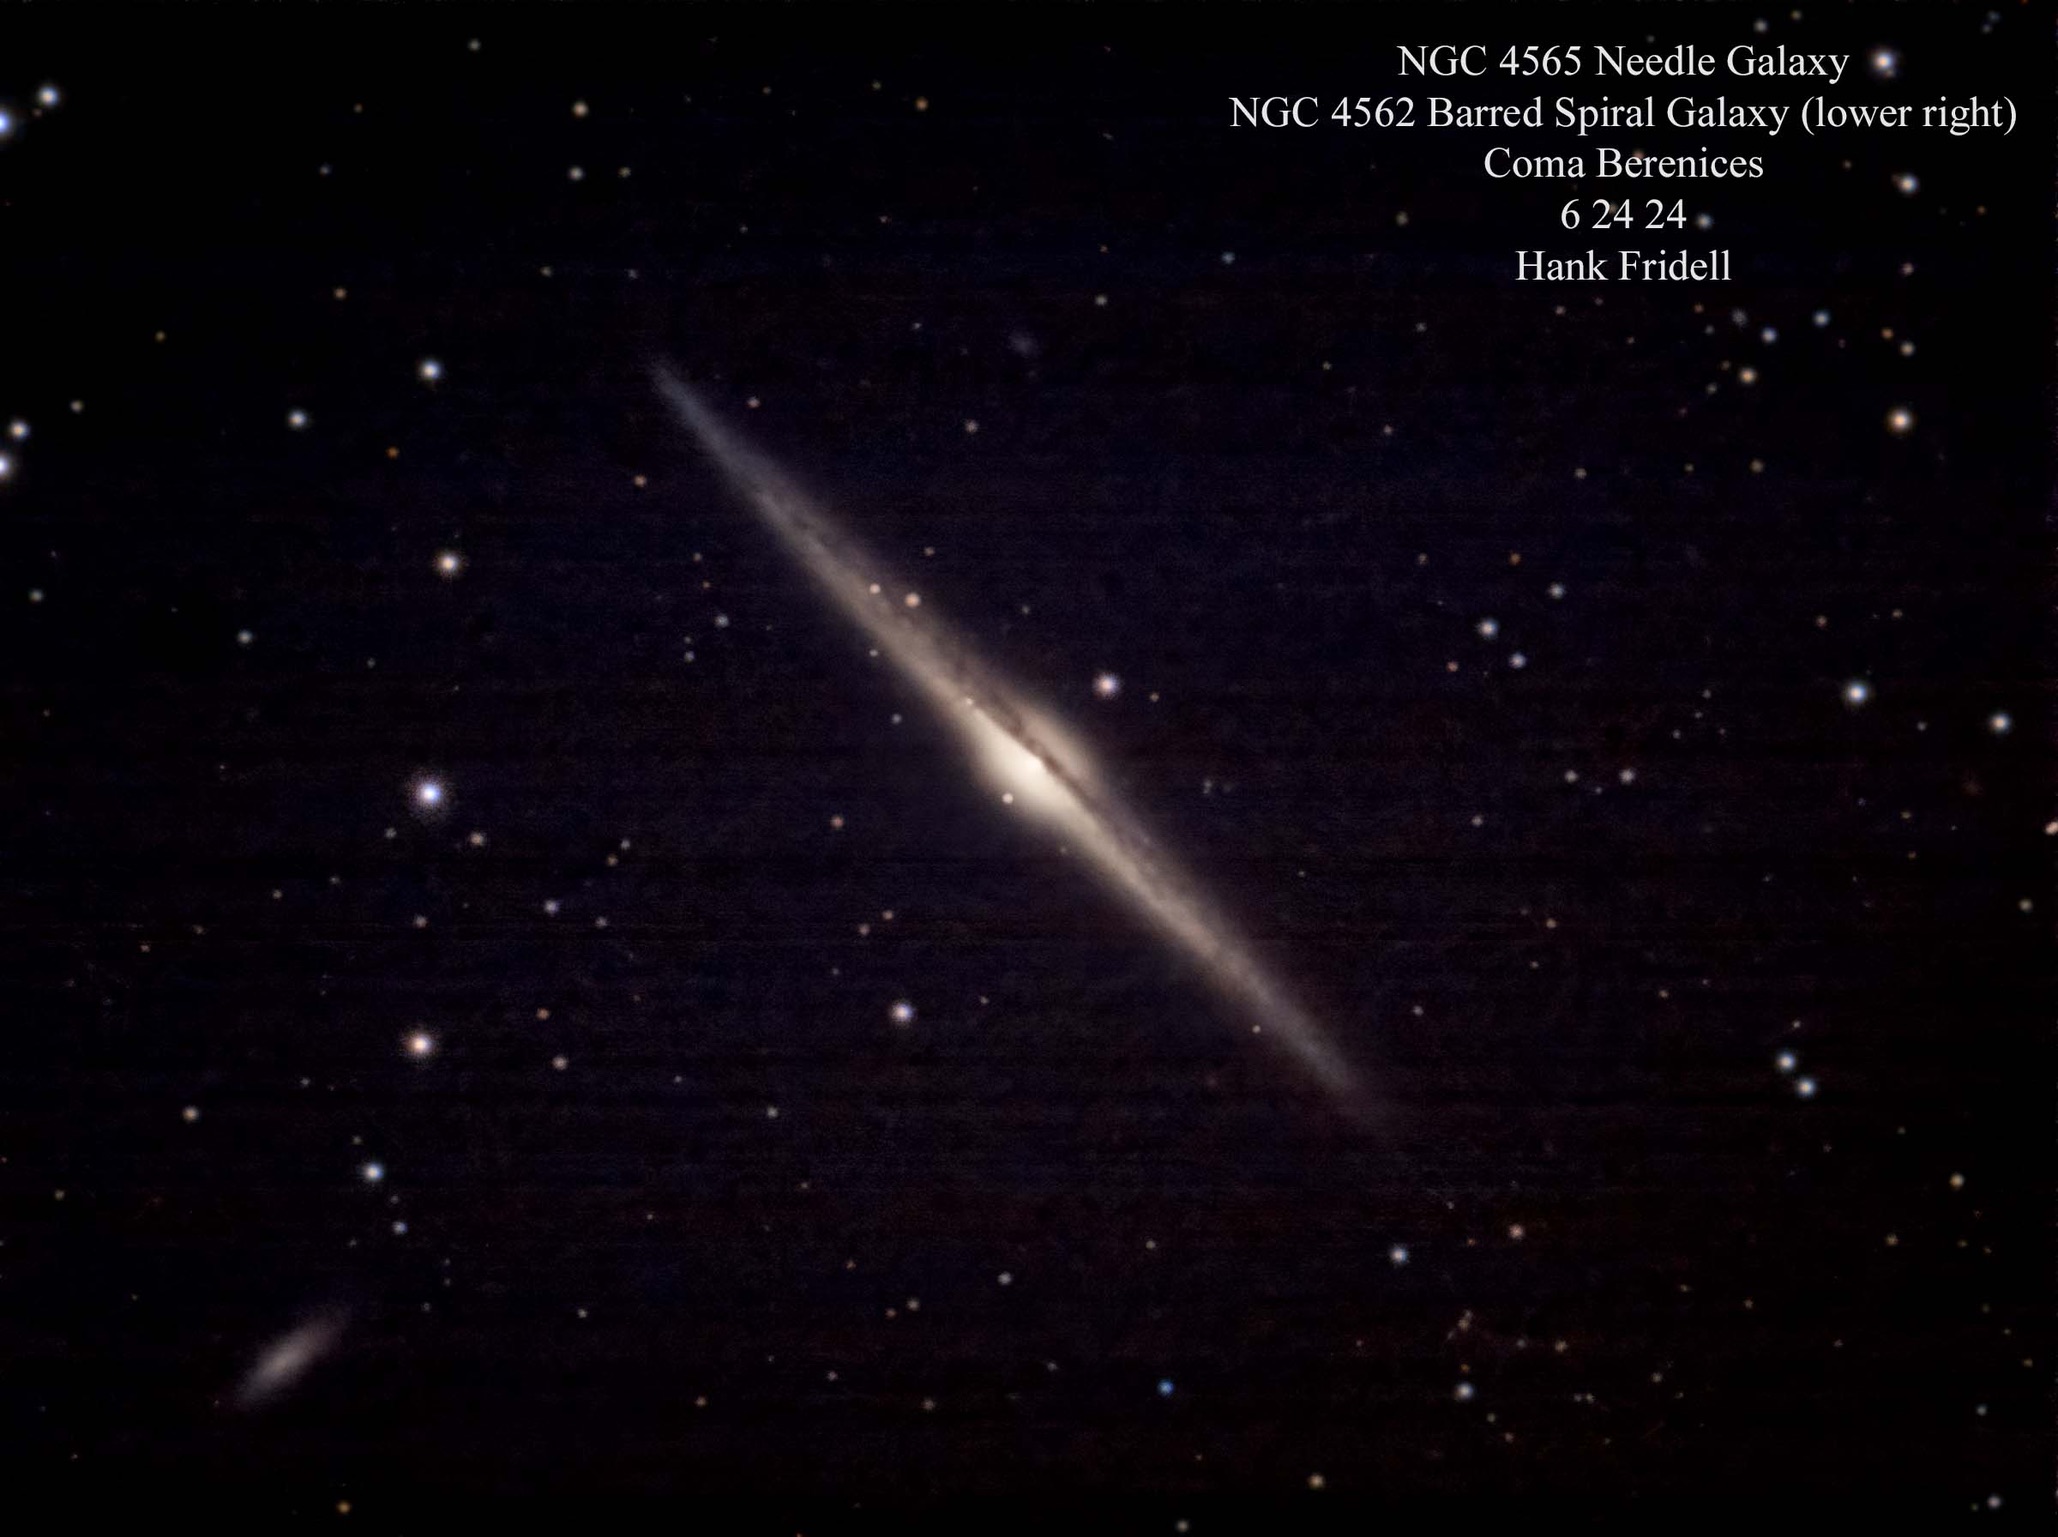
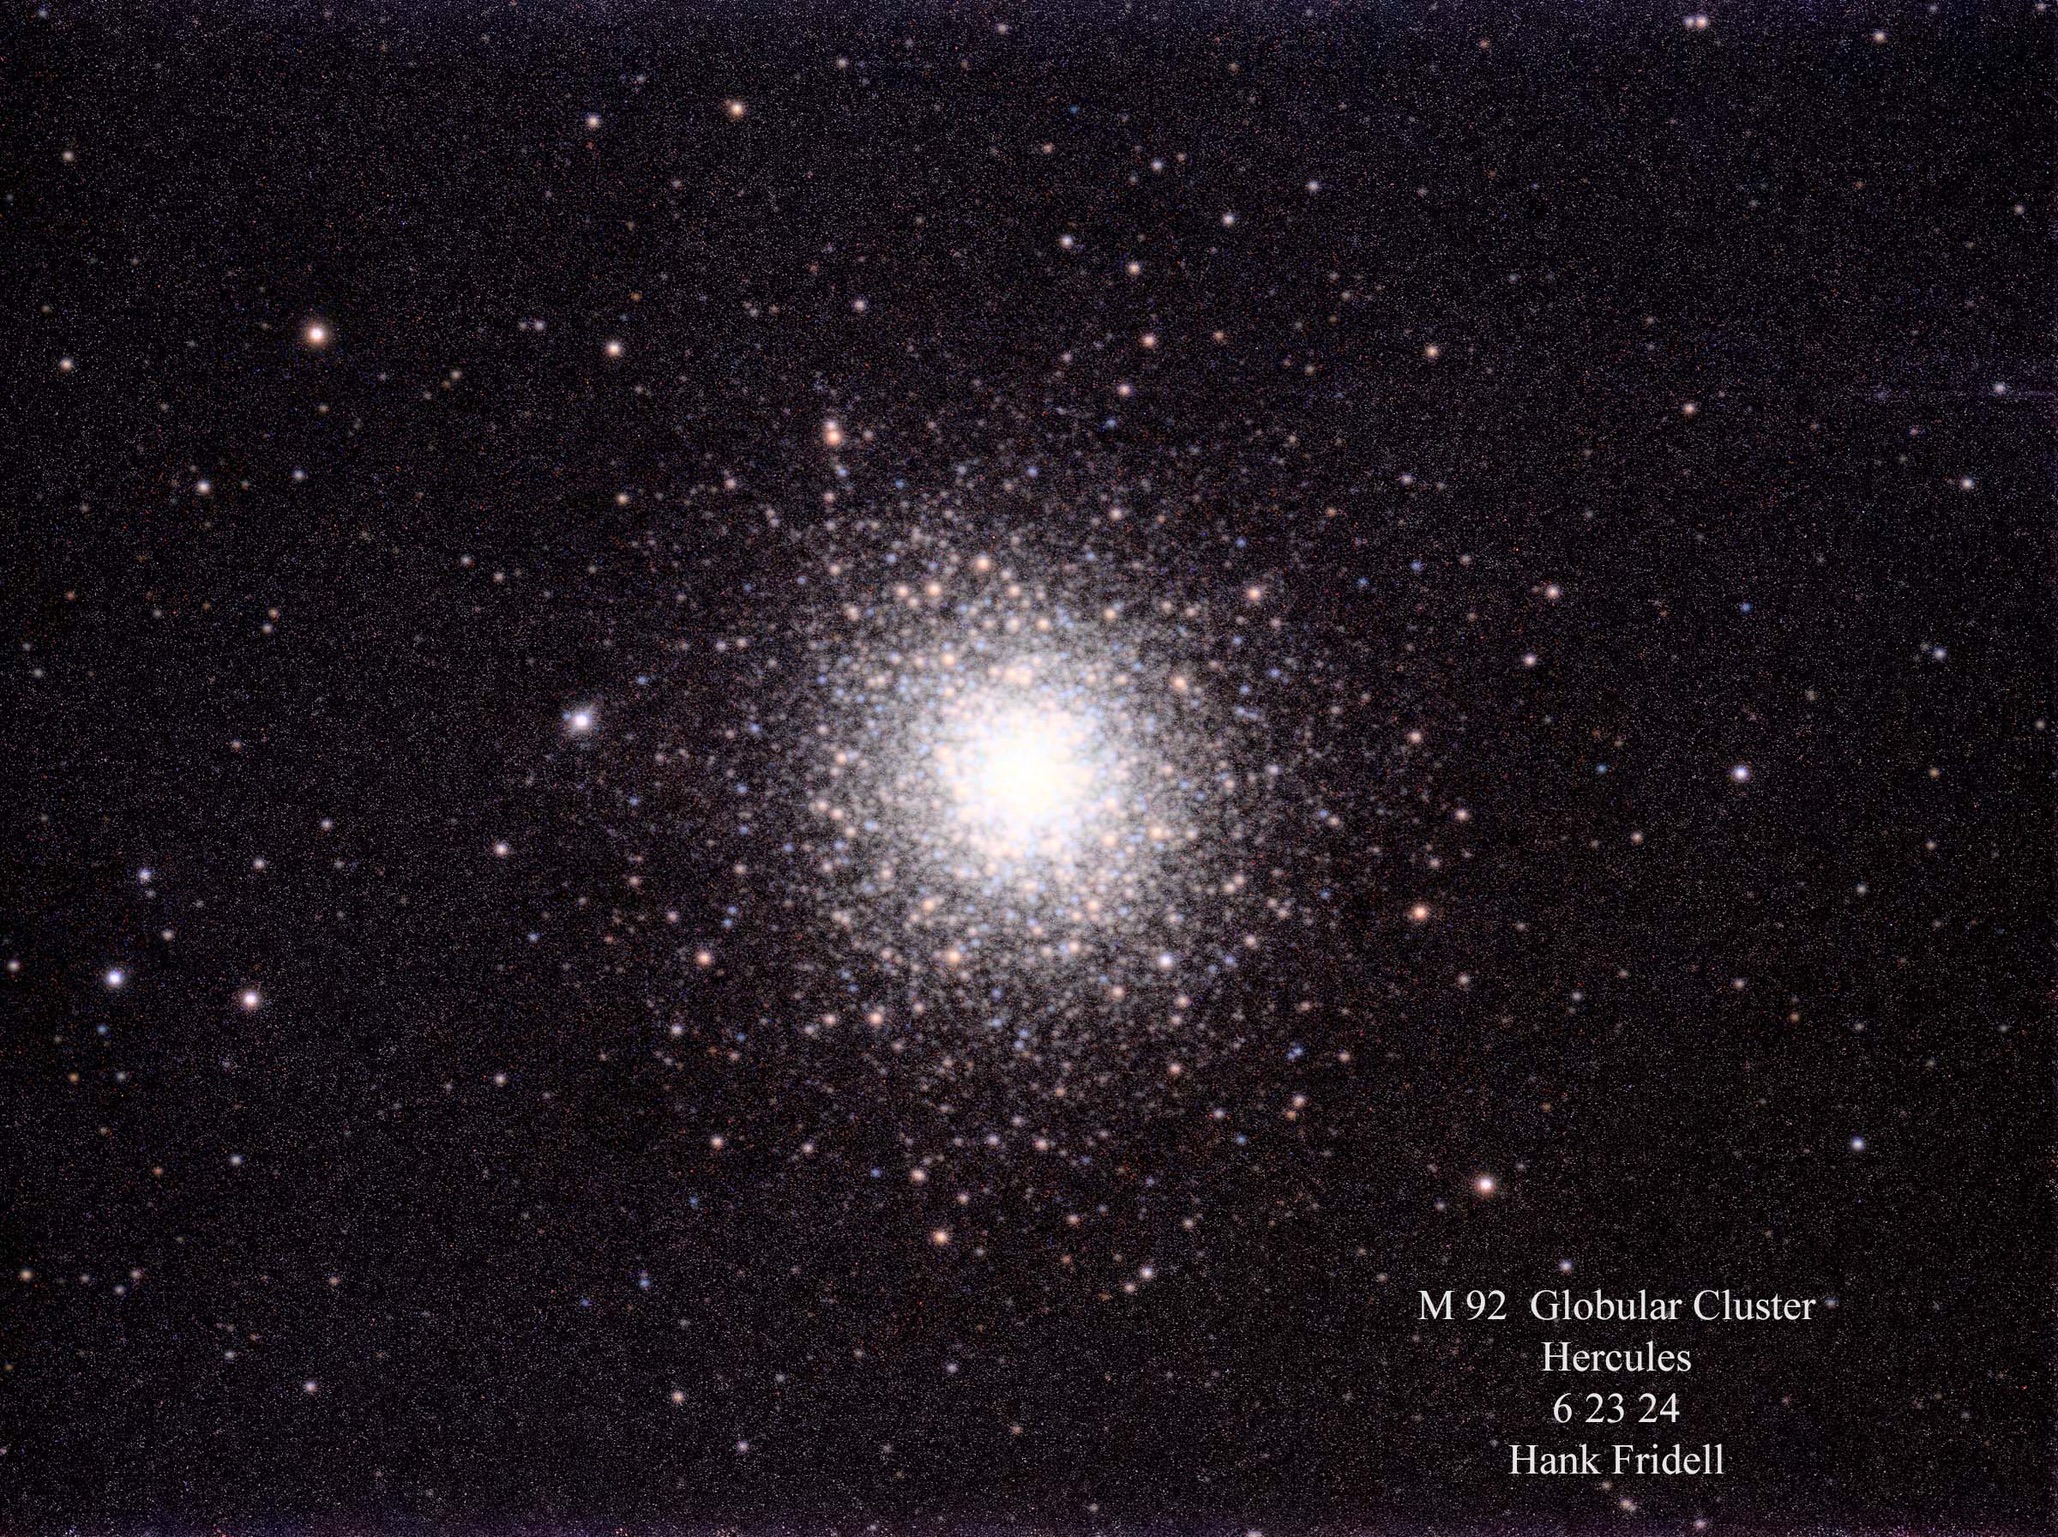
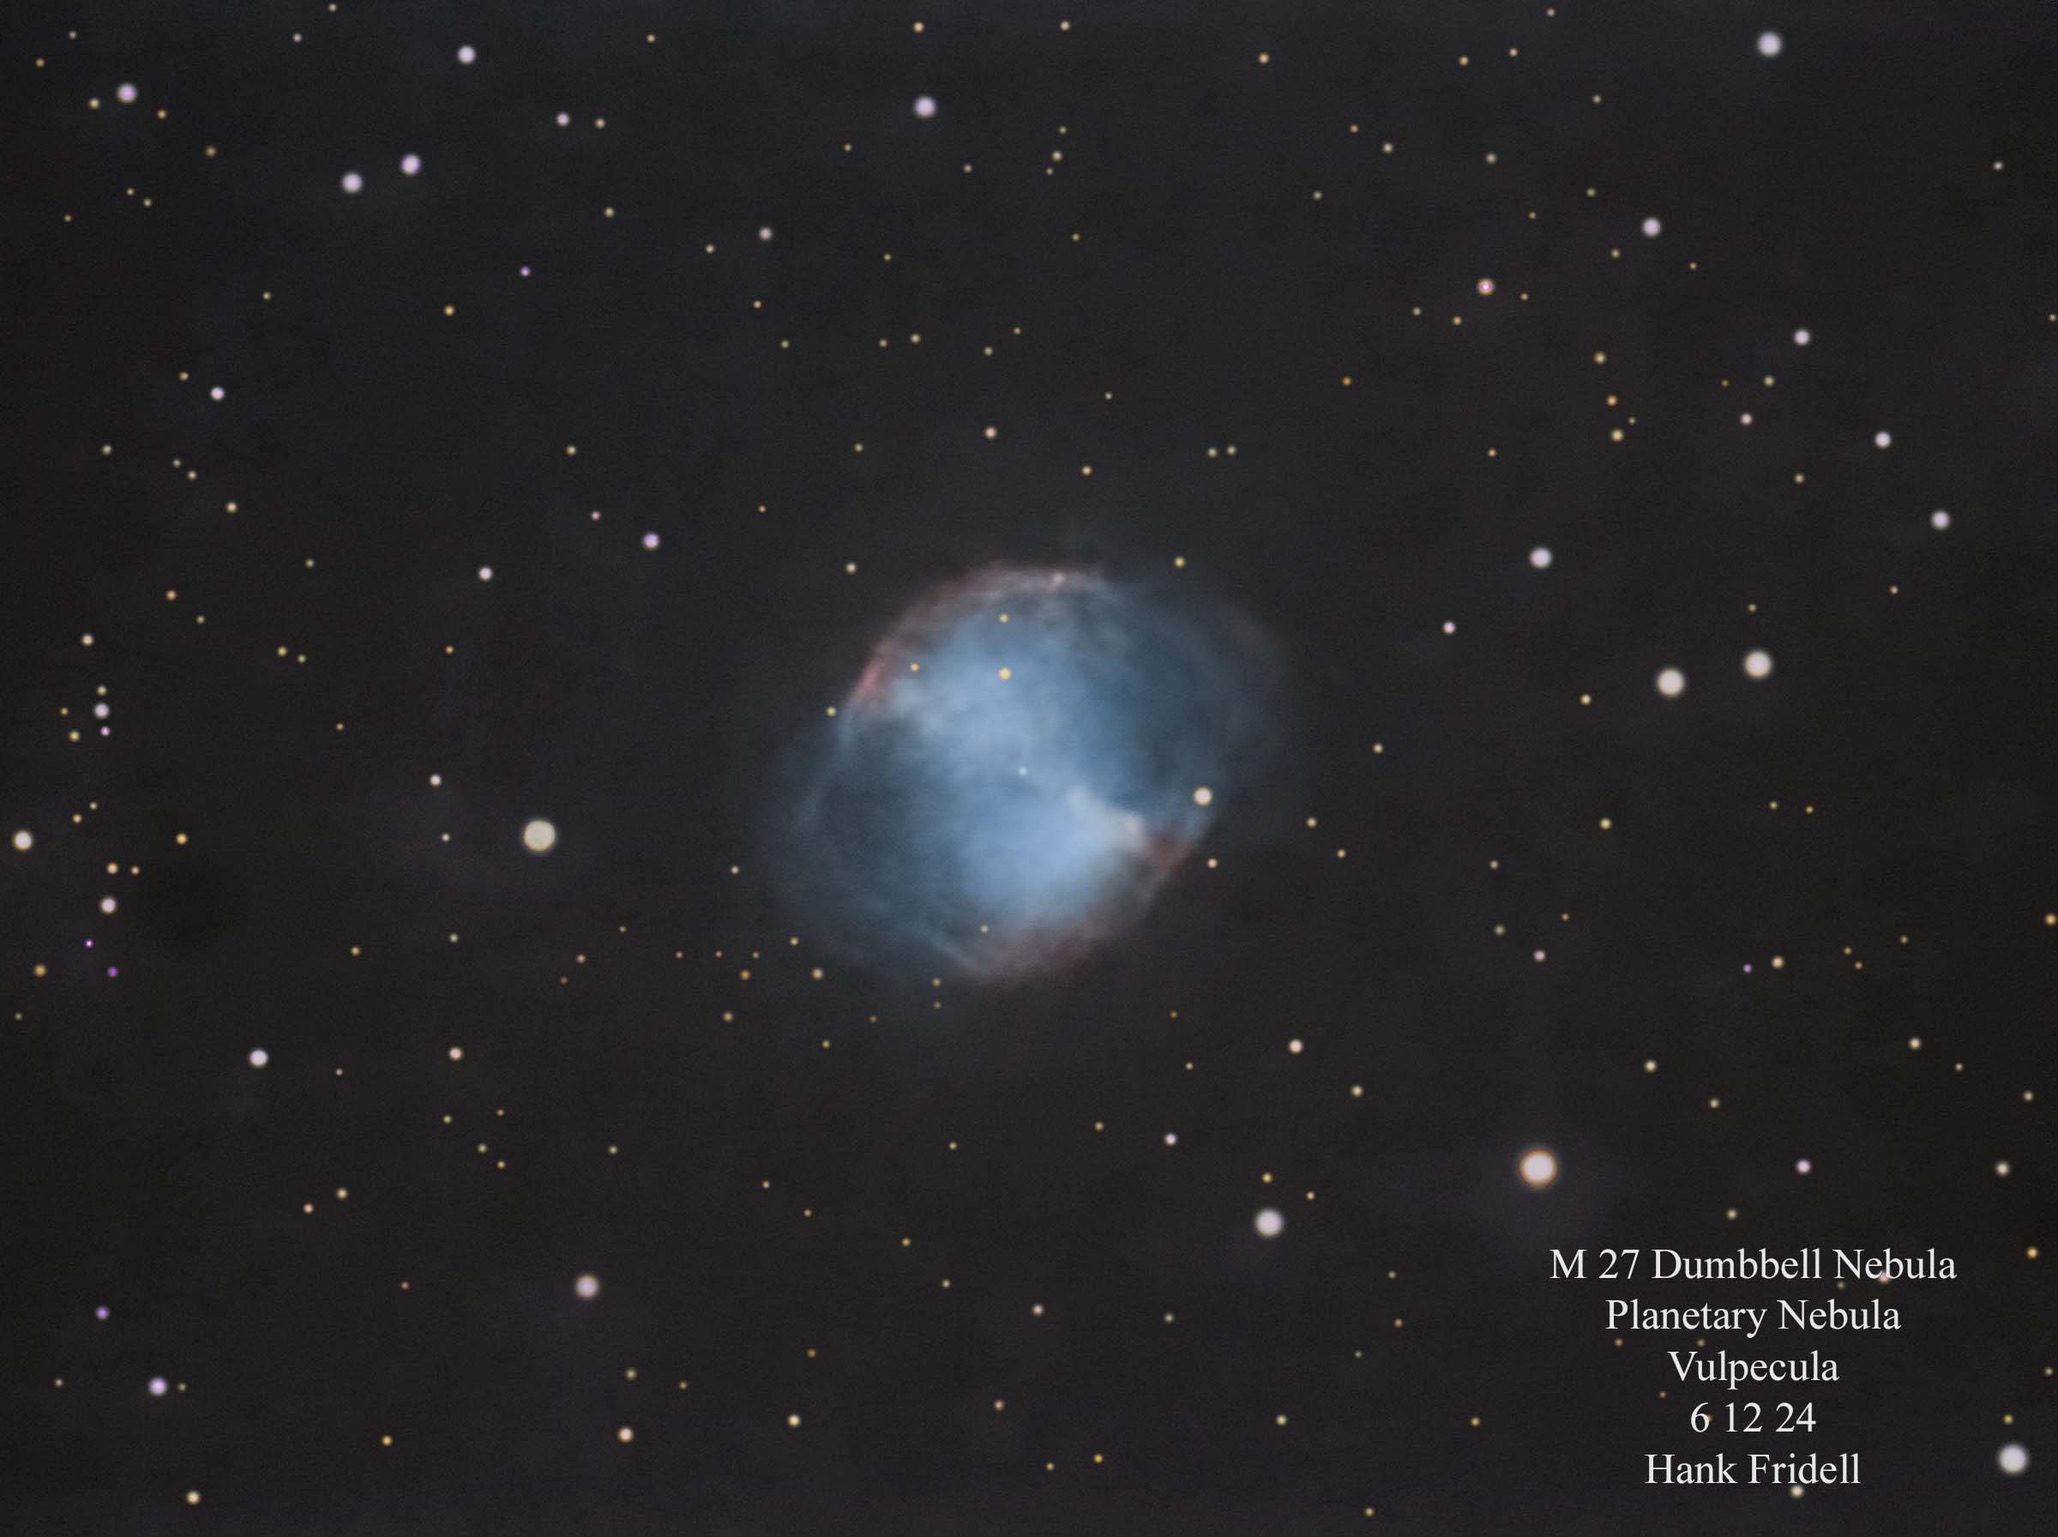
Each of these images represent about an hour of data using CCD Ciel.
On M 57 I added more detailed information about the image. What was interesting is that I compared this image to an EAA image that I took last year, and the hour’s worth of data showed a distant galaxy, IC 1296. The EAA image that had only about 10 minutes of capture time didn’t even show the ICC 1296 galaxy at all.
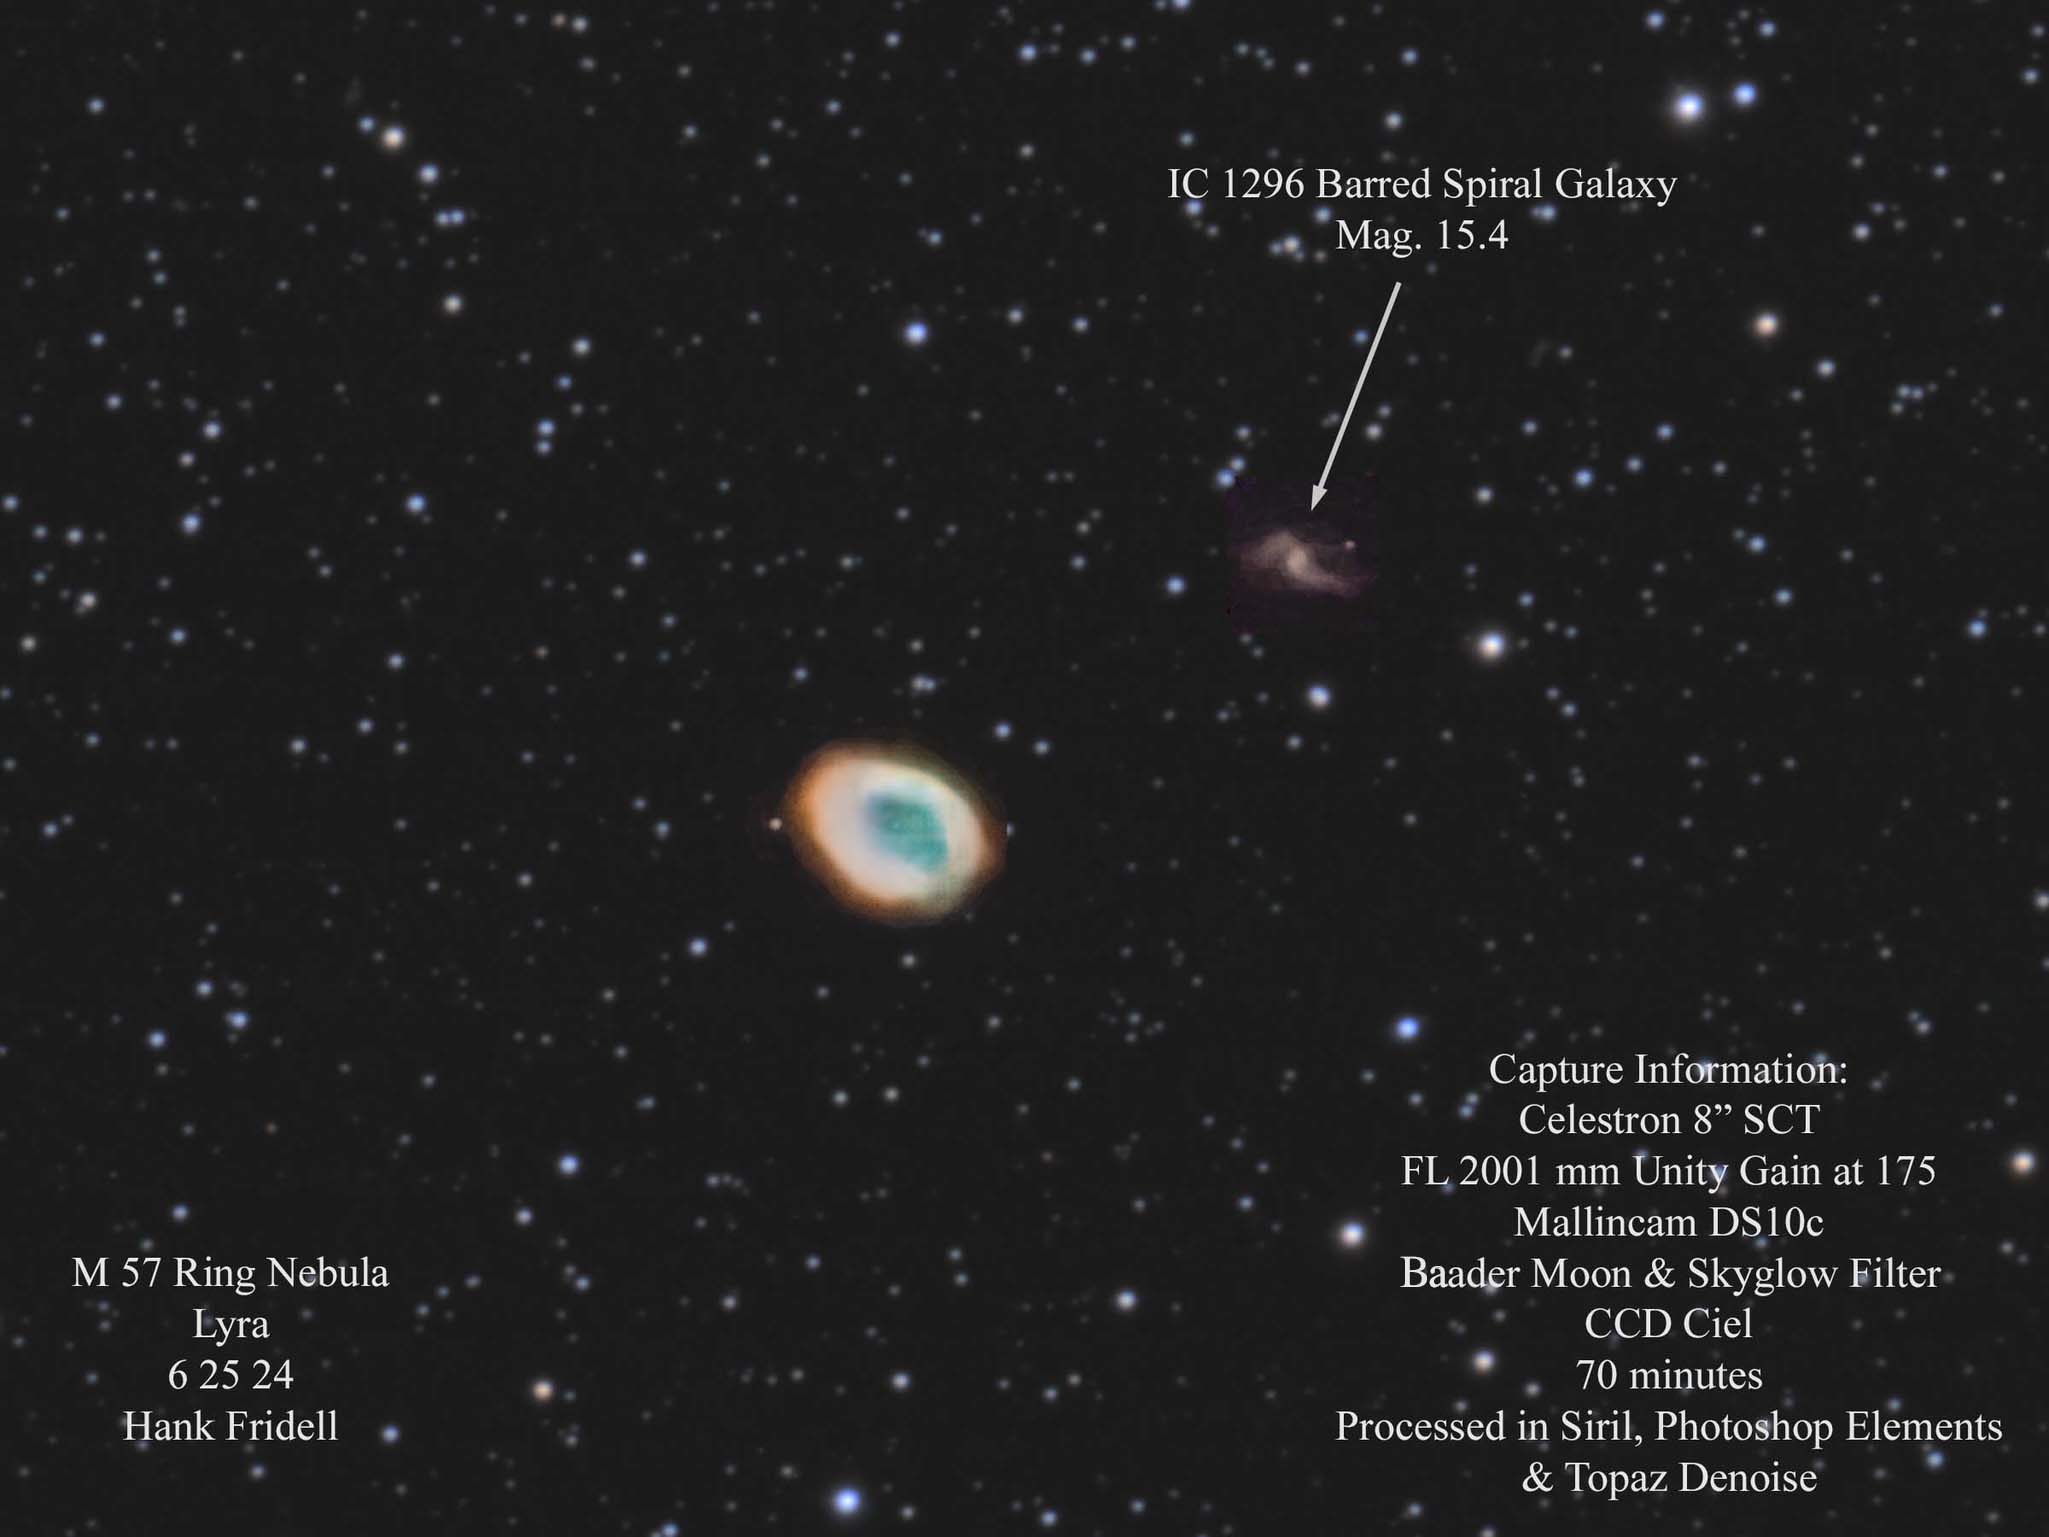
Here’s what that more detailed information means, and probably why IC 1296 showed up in the image:
Celestron 8” SCT: Celestron is the brand of telescope that took the photo. 8” means that the diameter (aperture) of the tube where the light comes in is eight inches. SCT stands for Schmidt-Cassegrain Telescope. This is a type of reflector telescope that uses mirrors and lenses to gather light. (https://en.wikipedia.org/wiki/Schmidt%E2%80%93Cassegrain_telescope)
FL 2001 mm: This is the Focal length of the telescope, or the length the path of light takes to come into focus. That is about six feet! (https://en.wikipedia.org/wiki/Focal_length)
Unity Gain: One of the things Chris helped me with was determine what the gain for my camera should be, or how much the camera should amplify the light from stars and stuff to get the best image. CCDCiel has a built-in tool to help determine unity gain, and it worked! My Mallincam DS10c has a unity gain of 173. Since I had been guessing that the gain should be about 3000, my photos will probably improve!
Baader Moon and Sky Glow Filter: I also use a couple of filters that I can put in the filter tray holder. This image used a filter that helps block out the glow of the Moon.
CCD Ciel: The software I used to capture the image. For this image, I took exposures of 2 minutes for a total of 70 minutes, or 35 images. These are called Light Frames. I also took three types of Calibration Frames.
1. Dark Frames: These measure the “noise” that the camera adds to a photo. The telescope is covered to black out all the light and the camera takes pictures of the dark, at the same settings that the image was taken with. I took 10 of those images.
2. Bias Frames: These images measure the amount of noise the camera creates when it is at its lowest settings. Things like a sensor that is always on (hot). I took 50 of these images.
3. Flat Frames: These images are taken with a neutral while light, either a clean t-shirt draped over the telescope or in my case, a light panel. The image that comes out shows all the dust and smears that are on the mirrors and lenses that might distort the images taken. I took 25 of those images.
Processed in Siril, Photoshop Elements and Topaz DeNoise:
Siril: This piece of post processing software uses the Light, Dark, Bias, and Flat Frames to put the image together. The lights are all stacked one on top of the other to bring in all 70 minutes of light that it gathered. It also uses the calibration frames to remove the noise it found. It also can perform many other adjustments to the picture to bring out the colors and details of the image. I also had Siril remove all the stars from the image, leaving just the background, or the nebulosity, of the image.
PhotoShop Elements: I loaded the starless image in Elements, using the Camera Raw setting. This allows me to make more adjustments to the color, darkness, sharpness, contrast, etc., of the image.
Topaz DeNoise: I then loaded the image I edited in Elements into DeNoise. If you zoom into these processed images, they are awfully grainy. DeNoise smooths out that graininess and can also help sharpen details in the image.
Back to Siril: I then load the image I processed in Topaz DeNoise back into Siril. The stars were then added back into the photo, and I adjusted the brightness of the stars.
Back to PhotoShop Elements: I loaded the Siril image that had both the background and the stars, cropped the image a bit and resized it. I added text to identify the image, date and….
Done!
Until next time…Clear Skies!
Hank
Sharper images every month. Progress. Complicated!
The hope is that the process keeps getting better! Thanks for paying attention, Mike! All the best! -H
Love what you’re doing..the vastness of space and time…hard for me to get my brain around it but seeing galaxies with this clarity is beautiful and humbling..thanks, Hank